Thursday, June 14, 2012
Planting Daylilies -- More Work than I Expected
I was excited and pumped up to bring all the varieties of daylilies home, I bought at "Fern Cove Daylily Farm" and plant them until I viewed the garden spot. Then I realized to "do it right" would be more work than I expected.
I had a lot of daylilies in the strip between the herb beds and the vegetable garden. I don't remember their names, so I just decided to call them by the color and try to coordinate the new ones I bought with hues to match. Above you see a coral that goes well with "Cameo Painting," "Phoenician Ruffle" and "Dublin Elaine."
This golden yellow bloom above, I call brown sugar and decided to mix it with "Shady Lady," "Scarlet Orbit" and "Sunshine."
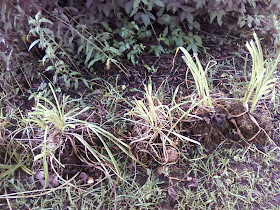
As you can see the chosen spot was filled with grass, small trees and yes, even patches of poison oak. So, as any smart gardener knows the ground needed preparation prior to planting the daylilies.
First I dug up any older plants and kept the clumps moist until I could get them back in the ground.
Next, I hoed, weeded and toiled to prepare the soil. I bought garden soil, bone meal and organic nitrogen to mix as a fertilizer to put in the bottom of the hole dug for each dayliliy plant. I made sure every hole had water applied before covering the tubers with dirt.
As, seen above, I cut all foliage including flower stems off the plant. I dug a hole and made a cone with the dirt then placed the bottom of the daylily in the middle of the cone of dirt and let the tubers fall down and around the cone making sure they were laying below the bottom of the plant. I finished by covering the plant to the crown and packing the dirt around the stem. I took this advice from the experts at "Fern Cove." The hardest work is done, now I just need to fill in around my new daylilies with my "no name" lilies and mulch, mulch, and mulch.
Although this was a bigger project than expected, just like cleaning for company, it needed doing and I can't wait to show you the rewards in the fall or, especially next spring.
Until, next time....
Happy Gardening 2012!
Posted by Wilma Smith


No comments:
Post a Comment