Tuesday, February 28, 2012

Growing herbs

Here is a primer on how to grow herbs to transplant in your garden.

 HERBS, ANNUALS

Annual Herbs only live for one year or season. You must replant each year. These plant do not tolerate cold or frost. Do not transplant until danger of frost is past. Annuals usually grow well from seed.

Arugula* -- Sow directly in garden, use in salads; plant 1 week after last frost       


Basil* -- Start seeds indoors 6 to 8 weeks before last frost; no frost tolerance; perennial in warm climates; bolts easily plant several times in season to continue harvest; transplant 2 weeks after last frost

Borage -- Start seeds indoors 6 to 8 weeks before last frost; transplant 1 week after last frost

Catmint -- Start seeds indoors 6 weeks before last frost; cats love this herb; transplant 1 week after last frost

Calendula -- Sow directly into garden, healing herb; plant 2 weeks after last frost

Chamomile
* -- Sow seeds directly in garden; does not transplant well; dry flowers to make tea; plant 1 week after last frost
                
Chervil* -- Sow seeds directly in garden or buy plants; does not transplant well; bolts easily; plant in garden 1 week after last frost
               

Cilantro, Coriander* -- Sow seeds directly in garden or buy plants; does not transplant well; bolts easily; buy slow-bolting varieties; cilantro seeds are called coriander; does not dry well; transplant 1 week after last frost

Cumin -- Sow directly in garden; or start indoors 4 weeks before last frost; transplant 1 week after last frost

Summer Savory* -- Start seeds indoors 6 to 8 weeks before last frost; transplant 1 week after last frost

HERBS, BIENNIAL

Biennial herbs take two years to complete a life cycle. Usually, they grow leaves, stems and roots in the first year of growth, die back for the winter and begin flowering and developing seeds the second year. It is a good idea to develop a cycle each year so that you can continue harvesting. Sometimes they may develop more quickly, in harsh conditions and can go through a two year life cycle in months. These plant do not tolerate cold or frost and are usually treated as annuals. Do not transplant until danger of frost is past.

Angelica -- Sow directly in garden; healing herb; likes partial shade; plant 1 week after last frost
                                   
Caraway -- Start seeds indoors 6 to 8 weeks before last frost; transplant 1 week after last frost

Clary -- Starts seeds indoors 6 weeks before last frost; similar to sage; transplant 1 week after last frost

Evening Primrose* -- Sow directly in garden; grows very large; can be invasive; healing herb; plant 1 week after last frost
               
Parsley -- Difficult to grow from seeds; usually grown as an annual; transplant 1 week after last frost


HERBS, TENDER PERENNIALS

Tender perennial herbs grow well in warm climates. It is possible for them to overwinter but they may diminish in vigor over time. These plant do not tolerate cold or frost and are usually treated as annuals. Do not transplant until danger of frost is past.


Dill* -- Can transplant; sow directly in garden; plant 2 weeks after last frost

Fennel* --  Sow seeds directly in garden, usually grown as annual; large plant; if using bulbs increase spacing; plant seeds 1 week after last frost


Rosemary -- Difficult to grow from seeds; can become large; not known to be cold tolerant in colder climates; may better tolerant cold when larger; overwinters better in warm climates; mulch heavily to increase chances of overwintering; may dig up and keep inside through the winter then transplant after danger of frost; transplant 2 weeks after last frost


HERBS, PERENNIALS
Perennial herbs will live for more than two years. Although they grow better from root stock better than from seeds, they usually produce flowers and seeds. Perennials tend to be harder to grow from seeds than annuals. Many perenials can be rooted or propagated by division. Perennials die back in the winter and grow back from the roots. In very harsh climates, this plant might be treated as an annual.

Anise* -- Sow directly in garden; large, slow growing plant; plant 2 weeks after last frost

Chives -- Difficult to grow from seeds; may propogate from division; transplant 1 week after last frost
               
Cornflower* -- Sow seed directly in garden; healing herb; use blue flowers only; usually grown as a flower; dried flower; plant seeds 2 weeks after last frost
               
Echinacea -- Sow seeds directly in garden; healing herb; plant 2 weeks after last frost

Lavendar* -- Start seeds indoors 6 weeks before last frost; hard to transplant; can grow large; can be propogated by division; transplant 1 week after last frost
                              
Lemon Balm -- Starts seeds indoors 6 weeks before last frost; transplant outside 1 week after last frost

Lemongrass -- Propogate by division; transplant 1 week after last frost

Lemon verbena -- Propogate by rooting; transplant 1 week after last frost

Lovage
-- Start seeds indoors 6 to 8 weeks before last frost; transplant 1 week after last frost

Marjoram
* -- Start seeds indoors 6 to 8 weeks before last frost; transplant 1 week after last frost

Mint -- Propogate by division; very hardy; may crowd other plants;  can plant in pots to keep from spreading and crowding out other plants; transplant 1 week after last frost

               
Oregano* -- Propagate by division; transplant 1 week after last frost

Sage* -- Hard to grow from seed; plant seeds outside 1 week after last frost

Tarragon -- Hard to grow from seeds; transplant 1 week after last frost


Thyme* -- Hard to grow from seed; usually grown as annual; heavy mulching may help to overwinter; transplant into garden 1 week after last frost

* This plant will grow from seed. Some herbs are harder to grow from seed that others. Hard to grow herb plants may be purchased from a nursery.

posted by Deberah Williams
Sunday, February 26, 2012

Signs of Spring


I am a big lover of plants, animals, rocks and dirt, just a few natural things, I love and when it comes to seasons, spring is my favorite. Born and raised in the geographic south (Newnan, Georgia), I'm glad our spring comes early because of  the humidity and location but mainly because of my southern regard for warmer weather. So every year, toward the end of winter, I search for sights and sounds in my yard indicating spring is around the corner. The photos in this blog were taken on the most recent search for signs of spring in my yard. Above, just bursting into bloom is a bunch of ornamental pear flowers. This beautiful tree abounds in bright white flowers and is a favorite of landscapers and homeowners alike.


The yellow bell bush (shown above) is one of the first signs of spring, as it blooms with bright yellow, bell-shaped flowers before any green leaves emerge from the woody stems. Trim to shape in the fall or in the spring, after all blooms have disappeared and the bush is only filled with green leaves. Also known as a forsythia bush many people use them as hedges and trim them into a box shape, I think they are more attractive in their natural oval bush shape but need cutting back every year.

And of  course you'll see the emergence of spring bulbs like the tulips, above. Most bulbs need care in the fall with a dose of bone and blood meal but even with this, will usually quit blooming or become smaller over the years. If you have a spring bulb garden, add new bulbs every fall and feed for a brilliant display of floral bliss in the spring.


I captured a photo of this single dandelion bloom in my yard and thought it looked more like a straw flower but soon it will grow into a dandelion circle of fluff and be blown away to bloom somewhere else in my yard. Considered a weed, use a weed and feed brand of fertilizer to combat any infestation in your yard. I look to new weed growth as another indication that the spring season is near.


When I begin to see green patches of grass and native wild ground cover around my property, I know the grass cutting season is not far away. I am still researching what this itsy-bitsy purple flower is named. To me they are so cute and if, I was an itsy-bitsy person this would be a big flower to me.


And of course the infamous daffodil is a great sign spring has sprung or is about to spring. Not only in my yard but I am seeing them everywhere, above is a King Alfred daffodil. This species tends to bloom later in the season, at least mine do.


If you have seen some of the same signs of spring, I also want to mention some sounds I listen for that tell me my favorite season is beginning. Sounds like crickets, tree frogs, bullfrogs and the honks of Canadian geese fighting for territory to mate and lay eggs to hatch for a new spring family. 

Of course we will still make a have frost or even snow (we have seen snow here in April). These signs do tell me it's time to till the garden, plant seeds in a cold frame or indoors, plant summer bulbs, plant early vegetables like sugar peas and plant root crops like beets, carrots and onions. Gee, now I need to rest just thinking about all the work I'll be doing the next six weeks!

Happy Gardening and have a fantastic Spring Season 2012! 

posted by Wilma Smith

Wednesday, February 22, 2012

Starting seeds indoors


It's time to begin planting seeds indoors for transplanting in the spring. We are located between planting zone 7b and 8a for middle Georgia. Go to this link for a Plant Hardiness Map to see when your area will most likely have its last frost. From that, you can determine when you need to start your indoor plants.

Last year was the first year I started my own plants and I would I have to give myself mixed reviews. I didn't strictly follow directions for the peat pots I bought that really messed me up.

This year I bought Jiffy peat pots again because I thought they were good to start my seeds. My biggest mistake in using them was that I put the seeds in the peat pots before adding water. My seeds then floated all over the place and I didn't know which plants were growing where until later.

This year I not only read the directions but followed them exactly. I think my chances of keeping up with my plants is excellent since I am keeping up with where my seeds are planted.

Here is how I did it. I bought Jiffy pots and my seeds.


I then filled the planter with water. The directions recommended 10 1/2 cups of water.


Here the seed pots are beginning to swell.


After about 15 minutes they look really good.


I added a little more water to make sure they are very wet and swell at least three times the size they were when dry.


They are now perfect.


I fluffed up the pots and added seeds, then stirred them a bit with a plastic marker. Some of the seeds, like the evergreen bunching onion seeds and the American Flag Leeks I planted needed to be planted close to the top of the soil. The basil, cilantro, lavender, tomatoes and pepper seeds I planted needed to be a planted a little deeper. Just follow the seed package directions for seed depth.


I made sure I marked the seeds with plastic markers. Later I will use these markers to stick in the ground when I transplant my seedlings. I also drew a rough template of each seed tray so I could know where my seeds were to stop me from being confused later.


I put these trays under grow lights in my basement and I am checking them everyday to see if they need water.

Now is the time to plant all of the slow-growing plants. The herbs, some flowers and some vegetables. I planted some tomato and pepper plants so I could have early plants. I may have to repot them and not transplant them directly in the garden if the weather remains cool. Right now it seems like it will be an early spring and I want to be prepared.

Next week I plan to plant more seeds and I will plant them each week until I have them all started. It will save me quite a bit of money I hope.


A reminder: My sister and I are starting a new garden club named the Crossroads Garden Club. The meetings will begin with an organizational meeting on February 28th. This is a club for local residents, but we will be offering online memberships after this date. I have added a link here for more information.

Tuesday, February 21, 2012

Crossroads Garden Club


One week from today, on February 28th at 7:00 pm we will be holding the charter meeting of the Crossroads Garden Club. This will be a new adventure for us and one we are looking forward to with great anticipation.

The location of the first meeting will be 3072 Highway 154, Newnan, Ga. This will be an organizational meeting and we will be taking care of club business, including selecting a by laws committee, electing officers and talking about our plans for 2012. Our subsequent meeting will be less business and more educational. We will have guest speakers and I hope we will also plan trips to local gardens. It all depends on what we decide. That is why this first meeting is so important.

Please consider this your invitation. We would love to have a vibrant and active Garden Club! For more information, email deberah@newnan.com or dellsaint@aol.com. We hope to see you there.

After our meeting, we will begin online memberships, but we have a few decisions to make on how we would like to set this up, so it will be a topic at our February 28th meeting.

Monday, February 20, 2012

A President's Day Salute


On this President's Day 2012, I wanted to share with you my "patriotic corner".  Much of this collection my father and I earned as both of us served our country in the U. S. Army. Pictured above is a top hat adorned with insignia I wore on my military attire. I feel this is especially appropriate today as it reminds me of President Lincoln 


Years ago, I made this Uncle Sam rabbit (pictured above) when my mom owned a craft store and I loved it so much, I couldn't bear to sell it but now resides with other "Americania" in my special corner. The plants are two Thanksgiving Cactus which are a favorite house plant.  I have a total of five in the colors of red, peach and fuchsia.


Above are some crystal pieces I acquired over time. They sit on a glass table top in my corner. The big eagle was a gift from the United States Postal Service in 2009 when I retired after 35 years (three years of military service included). The collector's plate is from a 1776-1976 Bicentennial Celebration.


My father added these Nazi artifacts (above) through his WWII experience during military service in Northern Africa and Europe. The gun is a German officer's automatic pistol encased in a leather holster with a clip. Amazingly, it still works but I never use it for protection! The metal box is  filled with Nazi insignia which have never been researched for the exact origin or why the German soldier may have worn them.


Now you have seen a little corner of my world and my heart (pictured above) which includes an immense love of my country. So today, I want to salute all our presidents, past and present for their service to America. Knowing the responsibility I felt as an enlisted soldier, it's hard to imagine all the responsibility our leaders have had and do have on their shoulders in their duty to the pursuit of life, liberty and happiness.

And as on any patriotic holiday, I also salute the men and women in uniform who continue to keep America safe and free!

posted by Wilma Smith

Thursday, February 16, 2012

My Valentine Suprises


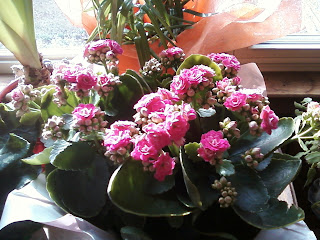
Tuesday was Valentine's Day and I always enjoy a good love story. As a gardener, I love surprises like the two house plants seen above my niece and sister gave me. On the right is a Kalanchoe (from my niece Amelia) and on the left is a Cyclamen (from my sister Deberah). Like a good love story, they both surprised me with some wonderful love!

I know in the past I have either bought or been given a Kalanchoe and a Cyclamen but often, today both are grown in commercial greenhouses and sold to retail stores in full bloom for gifts to consumers on special days like Valentine's Day. So, typically they are discarded after their blooms fade (obviously I did) but really both can be easily maintained and incorporated as an addition to your house plant collection. Since I plan to keep these beautiful love stories alive, I did the research needed to insure I could make it happen and add both to my collection of house plants.


First described by botanist Micheal Adanson in 1763 from several Chinese species, he noted, the Kalanchoe is a succulent or member of the cacti family. In Scandinavia it was nicknamed "spring fire" because of the brilliant red flowers it produced in the spring. It is also called "coral top" because of the original crown of red coral color that can bloom for months with minimum care. As you see above, now it has been hybridized into pinks, lilacs, yellows, oranges, as well as, the brilliant coral reds.


As a succulent, the Kalanchoe likes a bright, sunny spot in your house. Because it stores water in the leaves it should never be over watered (let the soil dry out). Bought new in full bloom is the only time to water more often. Later, I will pinch off any dead blooms and in late spring re-pot in well-drained, sandy soil, find a good sunny spot and incorporate with my other house plants on my breeze-way. These plants are easy to propagate by cuttings like most succulents and can be forced into bloom any time of year by storing in the dark sixteen hours a day for three months.


The Cyclamen makes a good Valentine's Day plant due to the heart shaped leaves it bears with light green heart shapes itched in the leaves. It is a perennial tuber originating from Mediterranean countries like Turkey and also the Greek Islands. Actually, it's name comes from the Greek word "kylos" meaning "ring" indicating the twisted way the seed pods ripen. I think it may also be the way the blooms open, as they appear twisted as buds before the full bloom evolves. Like most flowering house plants sold today, it has been hybridized into a variety of dark pink to white colors (as seen above I have a beautiful light pink).


Unlike the Kalanchoe, after a little research, I find this plant more challenging to maintain because it requires a cool environment, below 68 degrees and out of direct sunlight (I recommend a north facing window). Also, they are sensitive to watering and like high humidity. Water several times a week at the edge of the pot not on top of the plant or tubers. Re-pot in April or May in peat moss mixed with rich potting soil. But just like a new pair of shoes, I plan to get familiar with this jewel and make it bloom next year.

I hope you had love and surprises on your special day like me. Talk to you soon on my next blog!  

posted by Wilma Smith

Tuesday, February 14, 2012

A Valentine for gardeners


Even though chocolate is usually the preferred treat of the day, I thought it was time to come up with a Valentine treat most gardeners would appreciate. This wasn't hard to make, it has no calories and is something a gardener can use and reuse. To me it is a Valentine favor that is perfect -- for Valentine's Day, for this time of year and for people who love to garden.


 These Valentine seed pots are great for starting seeds to plant in the spring.

I started by buying seeds and little pots at a discount store. The little pots were 54 cents each and I couldn't resist the little clay trays that go with the pots, also 54 cents. I looked for "Valentine" seeds or seeds with appropriate names. I found only Sweet Pea, Forget-Me-Not and Impatiens seeds. I was hoping to find others like Sweet William, but I would have had to order them. The seeds cost $1.19 to $1.39 per package.

I then painted the outside of the pots with easy-clean-up acrylic paint. I didn't paint the pots on the inside because paint is a chemical compound and I didn't want any chemicals to harm the plant. After they were dry, I sanded them lightly, then used a no scratch pad on them to give them a vintage, shabby sheik look. 

I had the option of buying potting soil or small compressed peat refills. The refills fit the pots perfectly. All that's necessary is to add water. The discs will swell and you can then put seeds into the peat and the seeds will only need time to grow. Of course, you will need to add light, but that is something that cannot be packaged -- a shiny window might do. They need to be kept moist so the seeds will sprout.


You can give a seed package or make packages as I did and divide a regular seed packet among the smaller ones. I didn't think there was a need for an entire package of seeds for such a tiny pot. I just downloaded a template by searching the Internet for seed package template, then choosing the one I wanted. After that, I added a little photo of the seed on the front with the name.


I also added instructions on the back.


Then I used a glue stick to seal the package, and I was done.


Given as a gift this way, assembly is required. I just sat the pots and seeds on a little piece of foam or cardboard and used clear poly wrap so the little pots and seeds will show through. I tied on a ribbon and then added a sticker heart.

I also made some single ones and thought conversation hearts would also be a good idea. These are just too cute.

If you don't want to go to all the trouble of making a seed package, just wrap the package around the little pot and finish the pot or use a miniature gift bags. It's all good and I am sure your gardening friends wish they had come up with the idea.

Actually, I must give credit to MarthaStewart.com for the original idea but I did add my own unique packaging ideas and you can too. Happy Valentine's Day and Happy Seed Starting!

Monday, February 13, 2012

Gardening "by the light of the silvery moon"


Have you ever considered planning your garden or yard work activities "by the light of the silvery moon?" Well, maybe you should to reap the benefits of the moon's phases on earth's vegetation and soil. Ancient civilizations, such as, Roman and Mayan farmers looked up to the "man in the moon," followed the changes in "his" size and and shape to cultivate their crops, celebrate their harvests, maintain their gardens and repeat the cycle for thousands of years.

I noticed last year in our vegetable garden, very interesting growth in the plants and fruit over night when the moon seemed to be the brightest, so I decided to investigate (as the detective I would like to be) this amazing phenomena and the stories my father and other older gardeners had shared with me about "planting by the moon." Keeping things simple and to my roots, I looked through past and present issues of the Old Farmer's Almanac (I buy one every year) and discovered if you understand and use the basic facts and principals of the moon's monthly cycle the benefits may be worth the effort.
 

Just as the moon's gravitational pull causes ocean tides to ebb and recede, it also causes moisture in the earth's soil to rise and fall. This occurs during four phases the moon moves through during each cycle or month (this cycle lasts every 28 to 29 days). These phases begin with the new moon, then the first quarter, next the full moon and ends with the last quarter. The moon is waxing or the light of the moon increases during the new moon and first quarter. Likewise it is waning or the light of the moon decreases during the full moon and last quarter. Also, at the end of the last quarter the moon rests before the next cycle begins with the new moon. The moisture is pulled upward into roots and stems when the moon is waxing then downward into the soil when the moon is waning.

Therefore the best time to plant above ground plants like peppers, tomatoes, collards, cabbages, flowering plants, trees and shrubs is when the moon is waxing or between the new moon and end of the first quarter. Likewise the best time to plant root crops and seeds, such as peas, beans, carrots, beets, flower seeds, bulbs and tubers is when the moon is waning or between the full moon and the end of the last quarter.

In my quest to find out about this phenomenon of "planting by the light of the silvery moon," I found it can be complicated and technical, but an almanac like the Old Farmer's Almanac keeps it simple for anyone because it breaks down the moon phases every month -- not only to the date and hour, but to the exact minute -- helping you to plan your gardening and yard chores in advance, if you choose to use the moon's amazing effect on plants and soil. Simply put, remember the basic principals I mentioned above, when the light of the moon increases, plant above ground crops and when the light of the moon decreases, plant under ground crops, seeds, bulbs and tubers.

Although, in past seasons my sister and I have not used this schedule for gardening, this year, if possible, we plan to experiment with the vegetable garden and we'll let you know in the fall if our harvests are more productive. I am also planning my flower bed plantings around the phases of the moon and as the flowers bloom, I'll blog you in pictures, the outcome.

However, I know spring gardening plans and chores, always depend on the weather -- the last hard frost -- and your family schedule when beginning and executing any outdoor regime. Presently our fast paced lifestyles are probably why many of us don't follow the sayings and advice of our parents, grandparents and ancestors. I am going to slow down and enjoy some of the simple things in life like the moon this year.

Good Luck and Happy Gardening 2012!

Posted by Wilma Smith


Friday, February 10, 2012

Turnip time


Last week we found a nice surprise in our garden. Though our turnip greens are long gone, we checked underneath and found we had some nice turnips, some about the size of apples. Last year was the first time we had turnips to amount to anything.

At that time I wasn't really all that excited because I remembered that I wasn't too impressed with turnips when I was growing up, but I found a couple of recipes for roasted turnips and I thought it couldn't hurt to try them that way.

What I found was that I really love turnips baked with garlic. They were so delicious -- so much so that I will continue to cook my turnips that way from now on. My turnips were very sweet and delicious and different than I remember them. It could be the addition of the garlic or it might be that these turnips were grown without pesticides and with organic fertilizers.

This is how I prepared them.


I washed them and then peeled them. Then I peeled and chopped garlic.


I cut them in small pieces, lined a pan with parchment paper and oiled the paper with olive oil. Then I put all the cut up pieces of turnip and chopped garlic greens onto the parchment paper, added salt and pepper and poured about two tablespoons of extra virgin olive oil over the top and stirred them a bit with a spatula. I then placed them into a 400 degree oven.


I stirred them about every 15 minutes and cooked them about 40 minutes until they were tender and browned on the edges.


Now I am very happy when we have turnips. I will never turn my nose up at another turnip again, especially a turnip baked to perfection like these.